AWS IAM for People in a Hurry
How to quickly set up a user account using the AWS Console
Introduction
IAM, which stands for Identity Access Manager, is an AWS service that allows you to manage access to your compute, storage, database and application services on AWS' Cloud. This is done by creating users, groups and roles with the desired permissions to allow or deny access to your AWS resources. IAM is a global service and is available free of charge.
What we'll cover
- What you can do with IAM
- How you can set up a user with permissions
- Limitations/caveats
What can you do with the service?
You can specify permissions to control which users can access specific services, the kind of actions they can perform and which resources are available, ranging from VMS, DB instances and even the ability to filter DB query results. You can determine which users have MFA access to specific Amazon EC2 resources and perform specific actions on those resources, such as restricting who can lunch an Amazon EC2 instance. In combination with CloudTrail, you can keep track of all of the API calls made by the IAM users.
You can create users and assign them passwords and secret access keys.
You can create groups with similar access patterns, for example, the developer team group. Each developer account would be assigned to the group and inherit the same permissions set at the group level. You can integrate your existing enterprise identity system, such as Microsoft active directory. This is done by using standards-based federation technologies like SAML. It eliminates the need for additional sets of credentials to manage your AWS resources.
You can use roles to grant other people permissions to resources in your AWS account without sharing your password or secret access keys.
How does a typical setup look like?
Let us go through a few steps to set up an administrator account that you would use instead of your root account to manage your AWS compute, database, storage and application services. To make things smooth, the administrator account will have administrator privileges.
- First of all, you need to sign up for an AWS account. You can refer to How to set up a Free Tier AWS account to get you up and running.
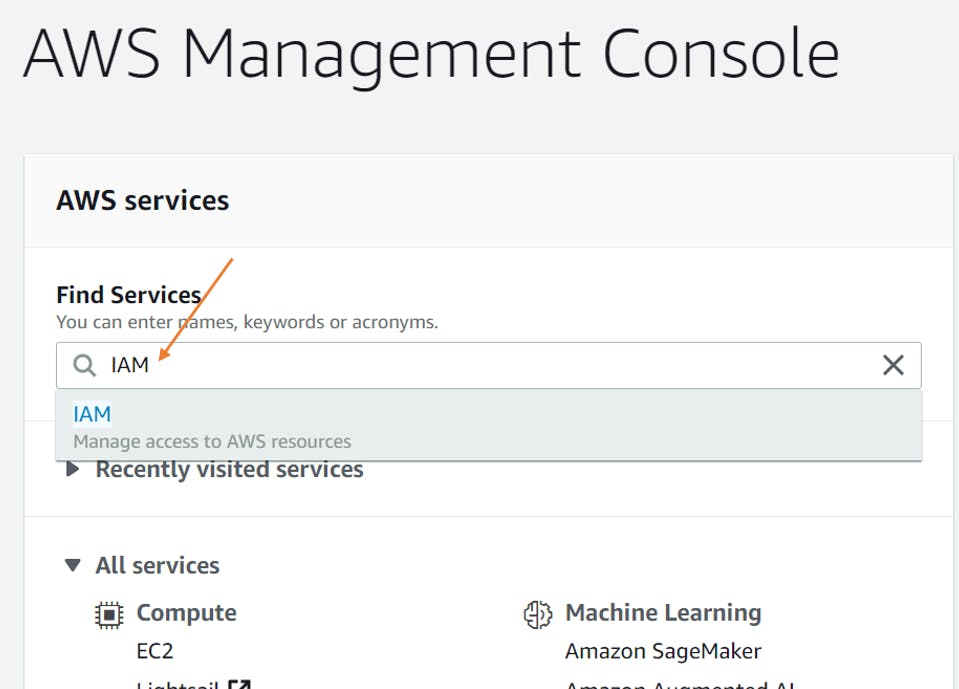
- Search and click on IAM in the search bar on the AWS console to avoid scrolling through all the AWS services.
- Click on Users on the left menu, then click on add user.

- Click on Add user

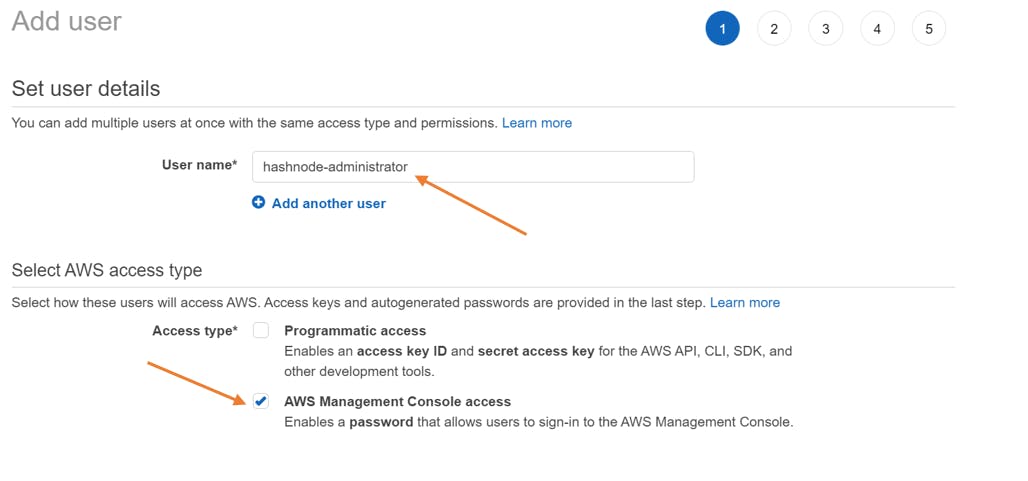
- Provide a name for the user and check AWS Management Console access.
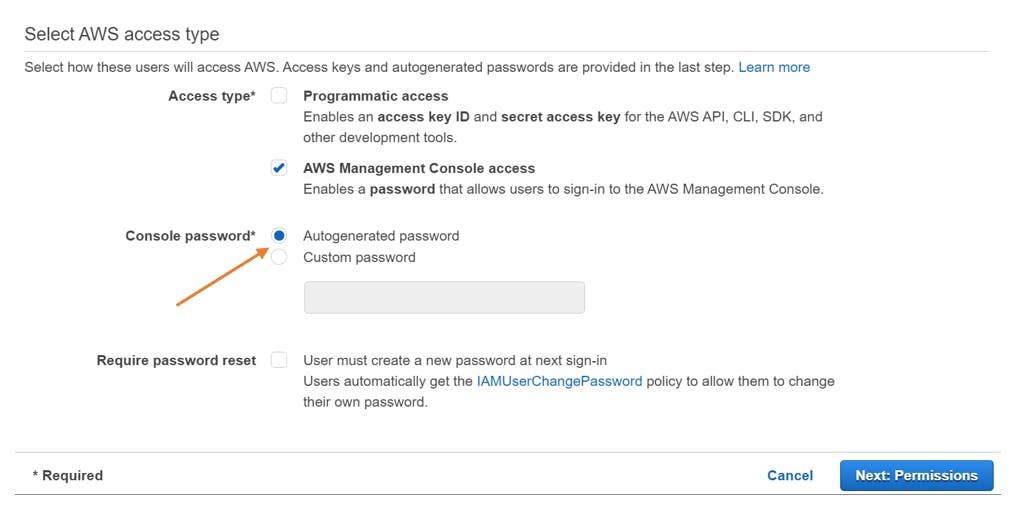
- Autogenerate password for the user and continue to permissions.
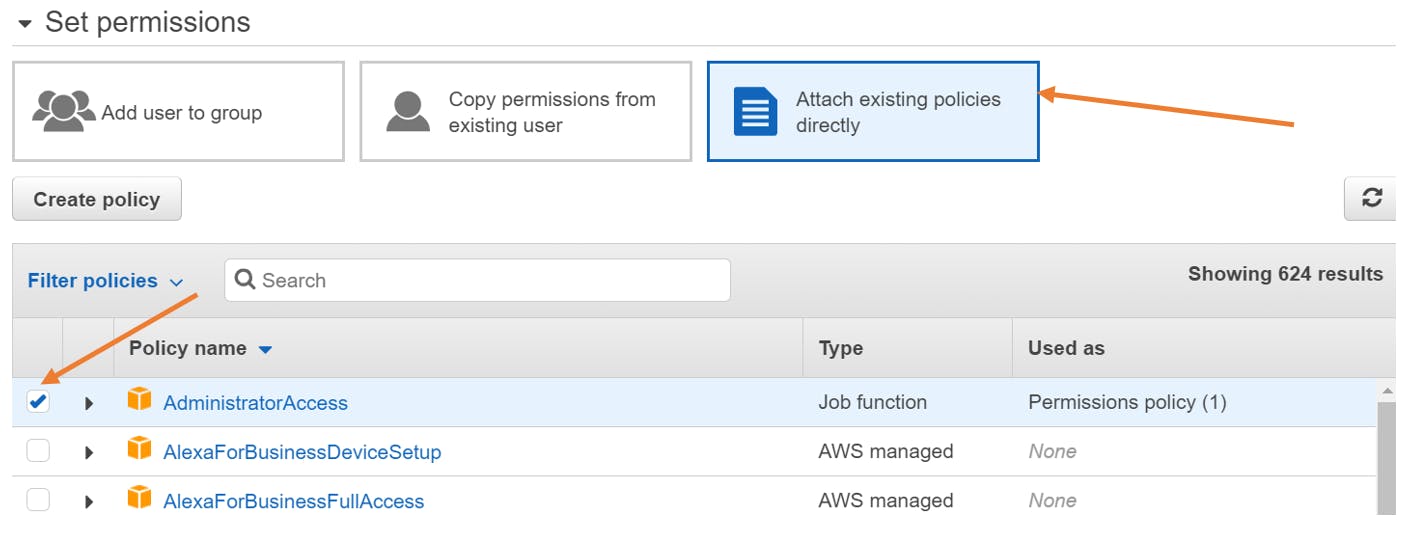
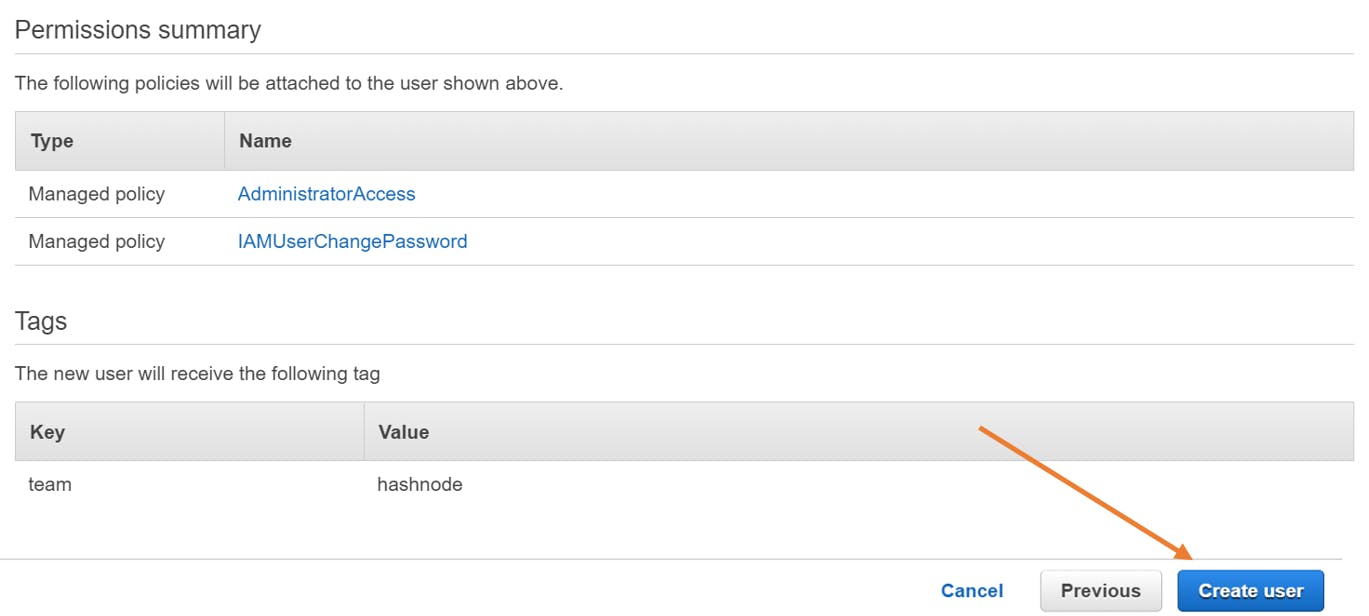
- Click on Attach existing policies directly and check the AdministratorAccess Policy.
This step is optional, but you can add an appropriate tag for the user.
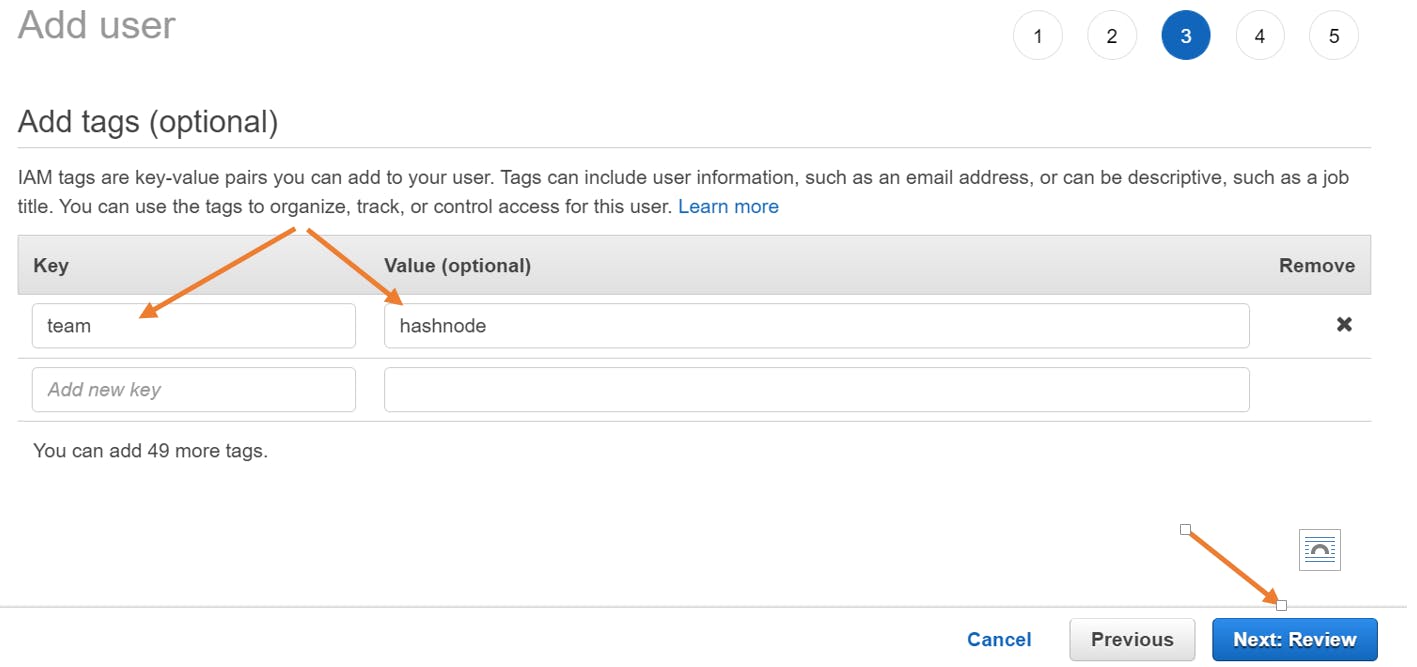
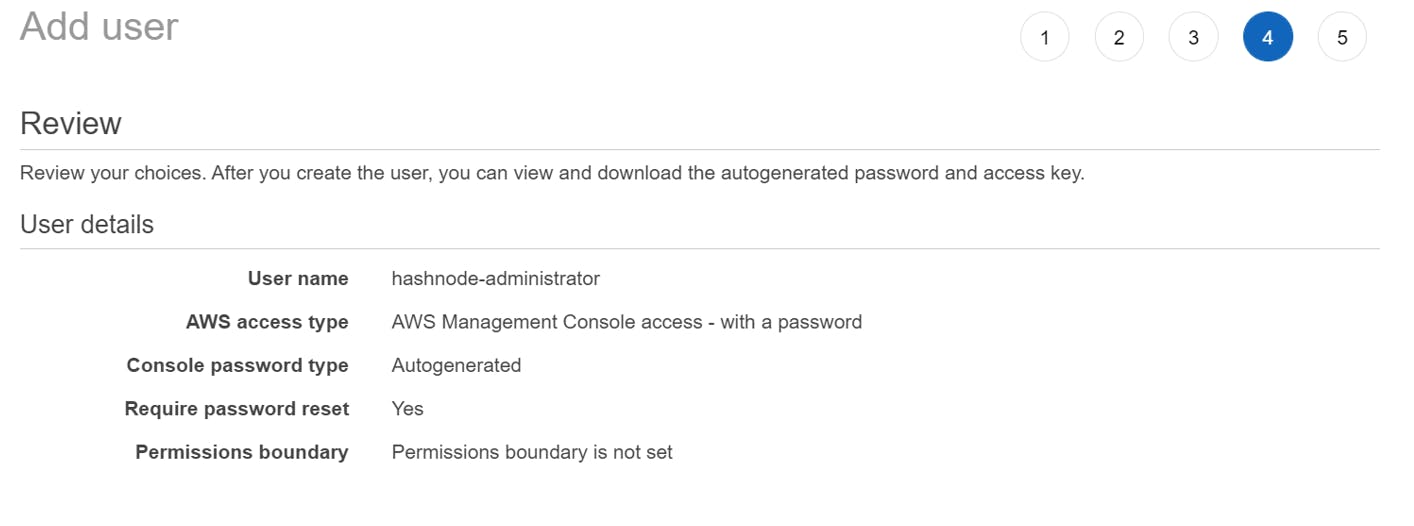
Review the configurations and click on Create user
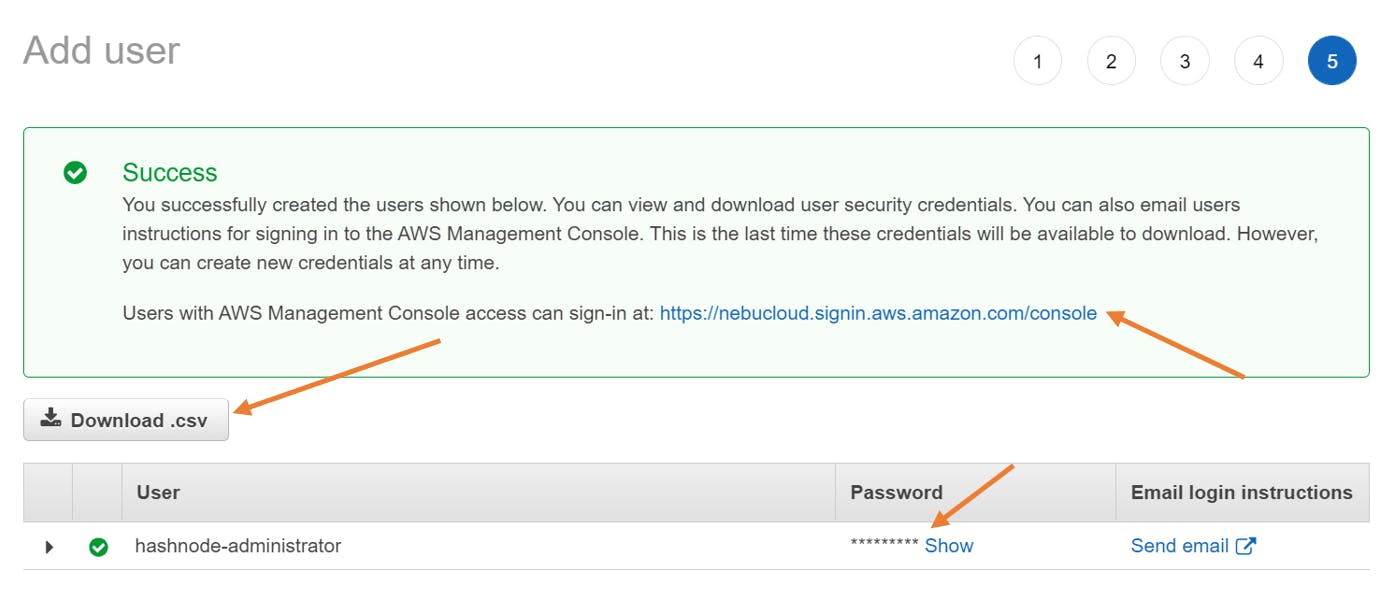
- Copy the sign-in link and the password which you would use to log in. You may also have the information sent to the user's email or download the .csv file with the information.
- The contents of the .csv file are;

- On the sign-in page, enter the username and auto-generated password.
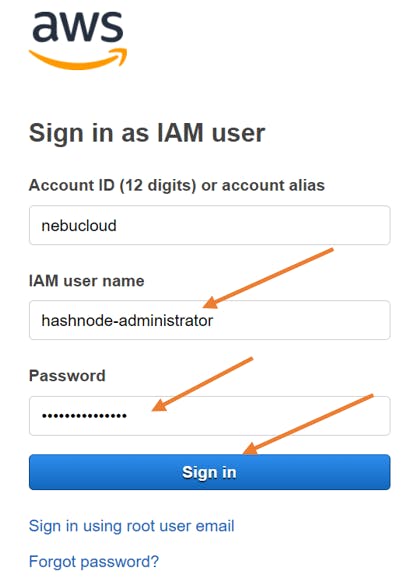
- The user would be prompted to create and confirm a new password.
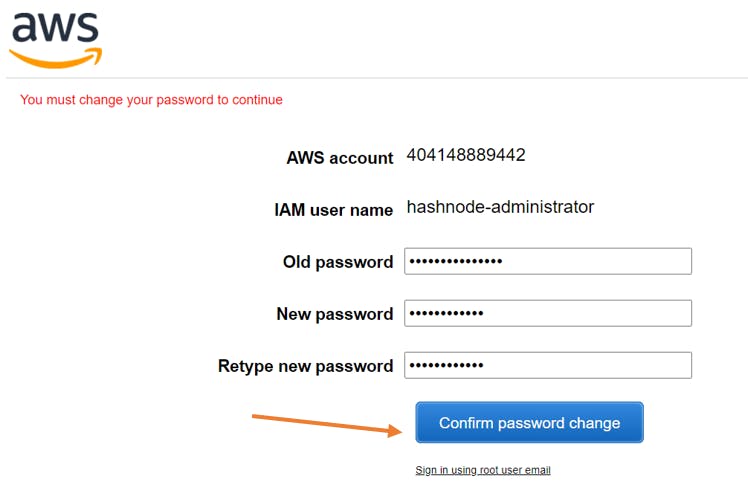
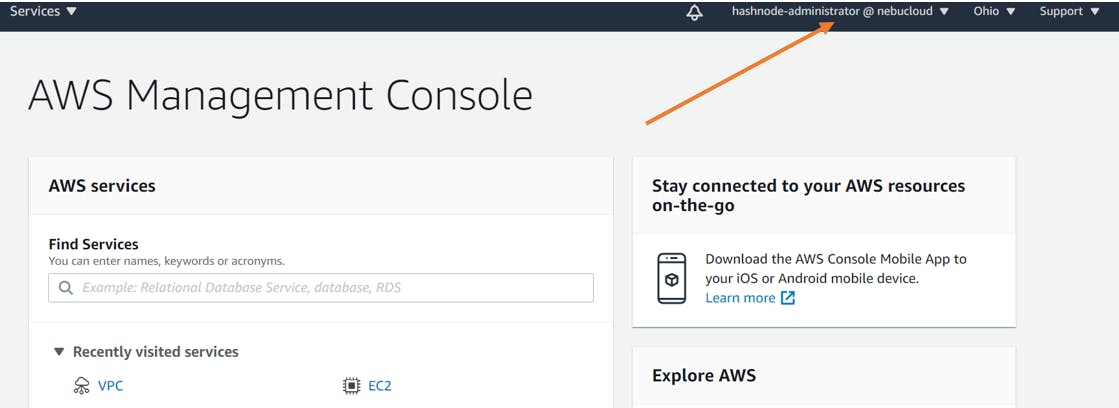
- Once that is completed, the user would land on the console. Pay attention to the top right corner, which indicates which account is logged into the console.
Limitations/Caveats
You are limited to 1000 IAM roles, but this can be increased with a support request to AWS alongside your use case. AWS account ID aliases must be unique across AWS products in your account. A user can be assigned a maximum of 2 access keys.
Conclusion
I know you are in a hurry so we must leave it at this for now. As usual, you can find more information by clicking on the links in the resources section below. Feel free to follow up with me in the comments section or on Twitter. Hope this has been very informative to you. Have a good one!